环境
Flutter 3.29
概览 在UIKit使用UIView类的对象进行页面开发,布局也是UIView类的对象,在Flutter中使用的是Widget,在概念上Widget可以理解成UIView。
差异:
有效期: Widgets是不可变的,它的生存期只到被改变前。当Widgets或它们的状态改变了。Flutter’s 框架会创建一个widget的实例,而UIKit中的UIView是不会重新创建,它是可变的,绘制一次并且在使用setNeedDisplay()使其失效之前不会重新绘制
轻量: Widgets相对更轻量,一个原因是它们是不可变,而且它们不负责显示和绘制,更多的是一种语义的描述。
Flutter 包含 Matterial 组件库,其中的Widgets都符合了Material设计指引。Material设计是个适配多平台的设计系统,也支持iOS
但如果想用iOS的UI风格,可以使用Cupertino widgets libray
使用UIKit开发时可以直接改变对应的视图。就像上面提到的,因为Flutter的Widgets是不可变的,可以通过更新Widget的状态来更新Widget。
这就是有状态 widget 与无状态 widget 的概念。StatelessWidget是没有附加状态的 widget。
当需要实现HTTP请求获取数据后根据数据动态改变的UI,可以使用StatefulWidget。
无状态和有状态 widget 之间的重要区别在于,StatefulWidgets 有一个 State 对象,用于存储状态数据并在树重建中传递数据,因此它不会丢失。
Text Widget是常见的无状态的Widget
1
2
3
4
class Text extends StatelessWidget const Text( String this .data, { ...
1
2
3
4
Text( 'I like Flutter!' , style: TextStyle(fontWeight: FontWeight.bold), );
初始化时并没有传递状态,要实现动态的修改Text Widget的内容,可以通过包装到一个StatefulWidget中
1
2
3
4
5
6
7
8
9
10
11
12
13
14
15
16
17
18
19
20
21
22
23
24
25
26
27
28
29
30
31
32
33
34
35
36
37
38
39
40
41
42
43
44
45
46
47
48
49
import 'package:flutter/material.dart' ;void main() { runApp(MainApp()); } class MainApp extends StatelessWidget const MainApp({super .key}); @override Widget build(BuildContext context) { return MaterialApp(title: 'Sample App' , home: CustomStatefulPage()); } } class _CustomStatefulePageState extends State <CustomStatefulPage > String text = 'I Like Flutter' ; void _updateText() { setState(() { text = "Flutter is Awesome!" ; }); } @override Widget build(BuildContext context) { return Scaffold( appBar: AppBar(title: const Text('Sample App' )), body: Center(child: Text(text)), floatingActionButton: FloatingActionButton( onPressed: _updateText, tooltip: 'Update Text' , child: const Icon(Icons.update), ), ); } } class CustomStatefulPage extends StatefulWidget const CustomStatefulPage({super .key}); @override State<StatefulWidget> createState() => _CustomStatefulePageState(); }
在UIKit中可以使用Storyboard和用代码去更新View的约束。在Flutter中,通过组合Widget树来展示布局。
1
2
3
4
5
6
7
8
9
10
11
12
13
14
@override Widget build(BuildContext context) { return Scaffold( appBar: AppBar(title: const Text('Sample App' )), body: Center( child: CupertinoButton( onPressed: () {}, padding: const EdgeInsets.only(left: 10 , right: 10 ), child: const Text('Hello' ), ), ), ); }
在UIKit中使用addSubview()或removeFromSuperview()来动态的添加或移除视图。在Flutter中Widget是不可变,没有那种类似addSubview()的方法。可以在父Widget传一个函数,然后控制显示的效果
1
2
3
4
5
6
7
8
9
10
11
12
13
14
15
16
17
18
19
20
21
22
23
24
25
26
27
28
29
30
31
32
33
34
35
36
37
38
39
40
41
42
43
44
45
46
47
48
49
50
51
52
53
54
55
56
57
58
59
60
61
62
63
import 'package:flutter/material.dart' ;import 'package:flutter/cupertino.dart' ;void main() { runApp(MainApp()); } class MainApp extends StatelessWidget const MainApp({super .key}); @override Widget build(BuildContext context) { return const MaterialApp(title: 'Sample App' , home: SampleAppPage()); } } class SampleAppPage extends StatefulWidget const SampleAppPage({super .key}); @override State<SampleAppPage> createState() => _SampleAppPageState(); } class _SampleAppPageState extends State <SampleAppPage > bool toggle = true ; void _toggle() { setState(() { toggle = !toggle; }); } Widget _getToggleChild() { if (toggle) { return const Text('Toggle One' ); } return CupertinoButton(onPressed: () {}, child: const Text('Toggle Two' )); } @override Widget build(BuildContext context) { return Scaffold( appBar: AppBar(title: const Text('Sample App' )), body: Center(child: _getToggleChild()), floatingActionButton: FloatingActionButton( onPressed: _toggle, tooltip: 'Update Text' , child: const Icon(Icons.update), ), ); } }
动画 在UIKit中,通过UIView的animate(withDuration:animations:)执行动画。在Flutter中,使用动画库将Widget包装在动画Widget内。
Flutter中使用AnimationController来控制动画的暂停,进度,停止。在屏幕刷新的每一帧,就会生成一个新的值。默认情况下,AnimationController在给定的时间段内会线性的生成从0.0到1.0的数字。
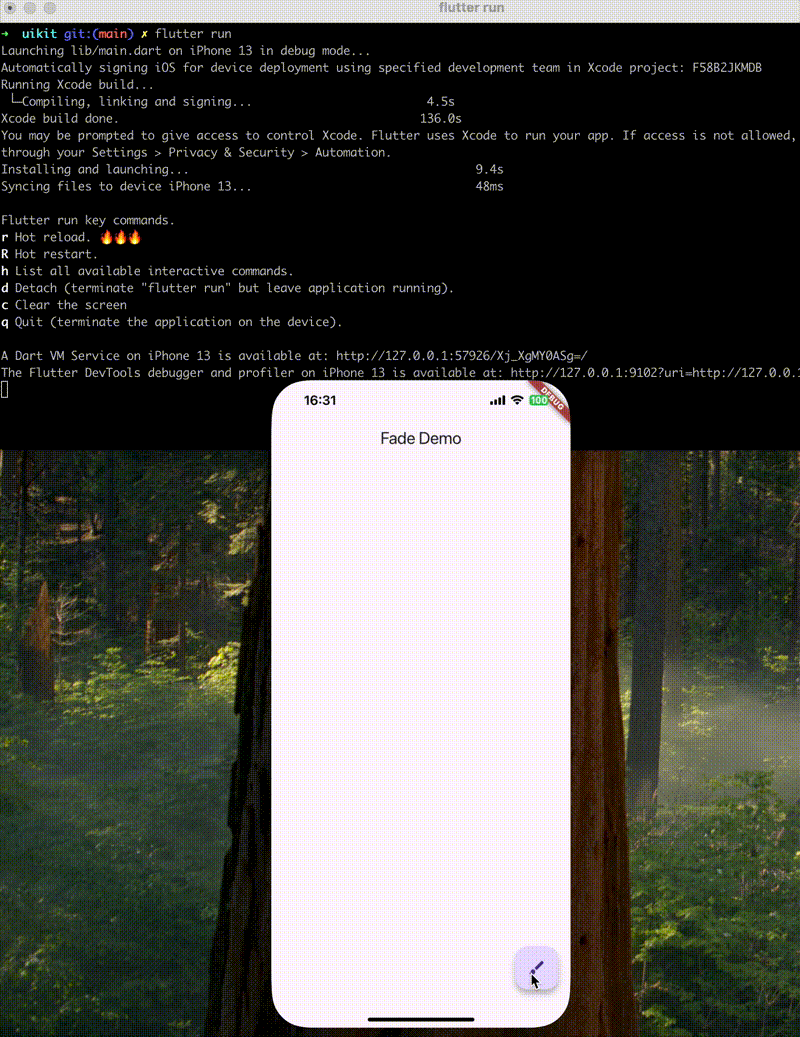
1
2
3
4
5
6
7
8
9
10
11
12
13
14
15
16
17
18
19
20
21
22
23
24
25
26
27
28
29
30
31
32
33
34
35
36
37
38
39
40
41
42
43
44
45
46
47
48
49
50
51
52
53
54
55
56
57
58
59
60
61
62
63
64
65
66
67
68
69
70
71
72
73
74
75
76
77
78
79
80
81
82
83
84
85
86
87
import 'package:flutter/material.dart' ;void main() { runApp(MainApp()); } class MainApp extends StatelessWidget const MainApp({super .key}); @override Widget build(BuildContext context) { return const MaterialApp( title: 'Fade Demo' , home: MyFadeTest(title: 'Fade Demo' ), ); } } class MyFadeTest extends StatefulWidget const MyFadeTest({super .key, required this .title}); final String title; @override State<MyFadeTest> createState() => _MyFadeTest(); } class _MyFadeTest extends State <MyFadeTest > // 单个 AnimationController 的时候使用 SingleTickerProviderStateMixin with SingleTickerProviderStateMixin { late AnimationController controller; late CurvedAnimation curve; @override void initState() { super .initState(); controller = AnimationController( duration: const Duration (milliseconds: 2000 ), vsync: this , ); curve = CurvedAnimation(parent: controller, curve: Curves.easeIn); } @override void dispose() { controller.dispose(); super .dispose(); } @override Widget build(BuildContext context) { return Scaffold( appBar: AppBar(title: Text(widget.title)), body: Center( child: FadeTransition( opacity: curve, child: const FlutterLogo(size: 100 ), ), ), floatingActionButton: FloatingActionButton( onPressed: () { controller.forward(); }, tooltip: 'Fade' , child: const Icon(Icons.brush), ), ); } }
绘图 在UIKit中使用CoreGraphics在手机屏幕上绘制线条和凸显。Flutter使用Canvas,CustomPaint,CustomPainter来实现绘制操作。
1
2
3
4
5
6
7
8
9
10
11
12
13
14
15
16
17
18
19
20
21
22
23
24
25
26
27
28
29
30
31
32
33
34
35
36
37
38
39
40
41
42
43
44
45
46
47
48
49
50
51
52
53
54
55
56
57
58
59
60
61
62
63
64
65
66
67
68
69
70
71
72
73
74
75
import 'package:flutter/material.dart' ;void main() => runApp(const MaterialApp(home: DemoApp()));class DemoApp extends StatelessWidget const DemoApp({super .key}); @override Widget build(BuildContext context) => const Scaffold(body: Signature()); } class Signature extends StatefulWidget const Signature({super .key}); @override State<Signature> createState() => SignatureState(); } class SignatureState extends State <Signature > List <Offset?> _points = <Offset?>[]; @override Widget build(BuildContext context) { return GestureDetector( onPanUpdate: (details) { setState(() { RenderBox? referenceBox = context.findRenderObject() as RenderBox; Offset localPosition = referenceBox.globalToLocal( details.globalPosition, ); _points = List .from(_points)..add(localPosition); }); }, onPanEnd: (details) => _points.add(null ), child: CustomPaint( painter: SignaturePainter(_points), size: Size.infinite, ), ); } } class SignaturePainter extends CustomPainter SignaturePainter(this .points); final List <Offset?> points; @override void paint(Canvas canvas, Size size) { final Paint paint = Paint() ..color = const Color.fromARGB(255 , 29 , 25 , 25 ) ..strokeCap = StrokeCap.round ..strokeWidth = 5 ; for (int i = 0 ; i < points.length - 1 ; i++) { if (points[i] != null && points[i + 1 ] != null ) { canvas.drawLine(points[i]!, points[i + 1 ]!, paint); } } } @override bool shouldRepaint(SignaturePainter oldDelegate) => oldDelegate.points != points; }
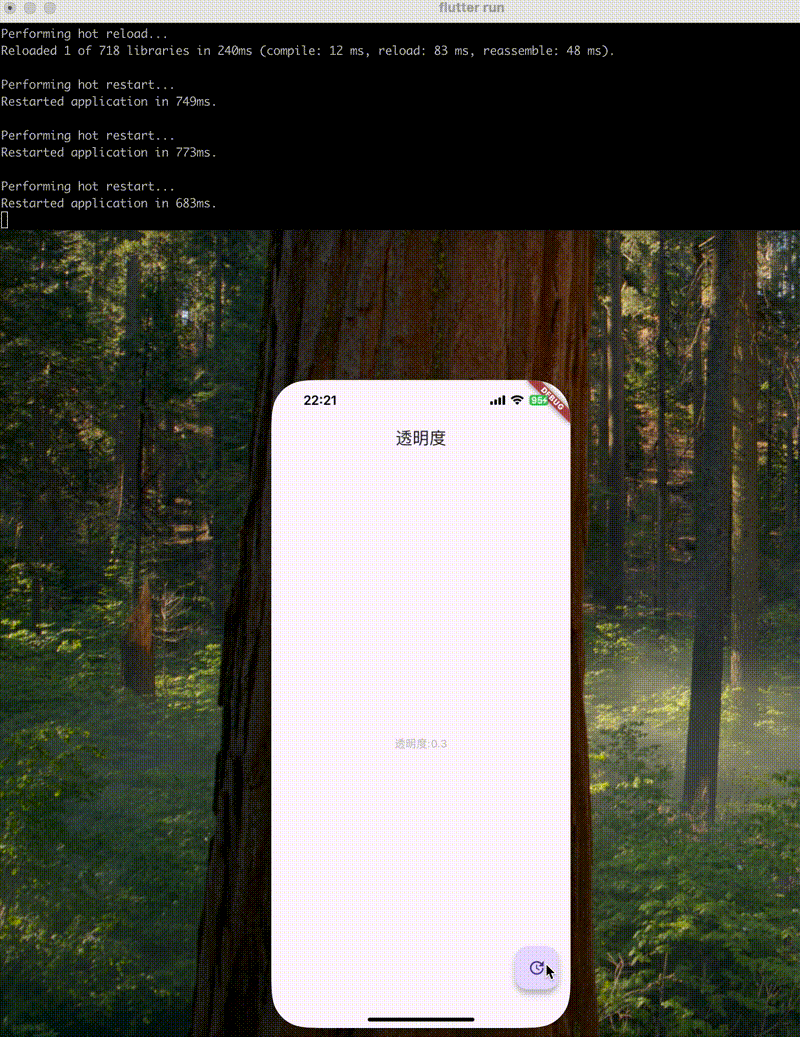
透明度 UIKit中使用.opactiy或者.alpha实现。Flutter中使用Opacity 组件来实现
1
2
3
4
5
6
7
8
9
10
11
12
13
14
15
16
17
18
19
20
21
22
23
24
25
26
27
28
29
30
31
32
33
34
35
36
37
38
39
40
41
42
43
44
45
46
import 'package:flutter/material.dart' ;void main() { runApp(MainApp()); } class MainApp extends StatelessWidget const MainApp({super .key}); @override Widget build(BuildContext context) { return MaterialApp( title: 'Flutter layout demo' , home: CustomStatefulPage(), ); } } class CustomStatefulPage extends StatefulWidget const CustomStatefulPage({super .key}); @override State<StatefulWidget> createState() => _CustomStatefulePageState(); } class _CustomStatefulePageState extends State <CustomStatefulPage > double opacity = 0.3 ; String text = "透明度" ; @override Widget build(BuildContext context) { return Scaffold( appBar: AppBar(title: Text(text)), body: Center( child: Opacity(opacity: opacity, child: Text("透明度:$opacity " )), ), floatingActionButton: FloatingActionButton( onPressed: () { setState(() { opacity = 1.0 ; }); }, tooltip: 'Update Text' , child: const Icon(Icons.update), ), ); } }
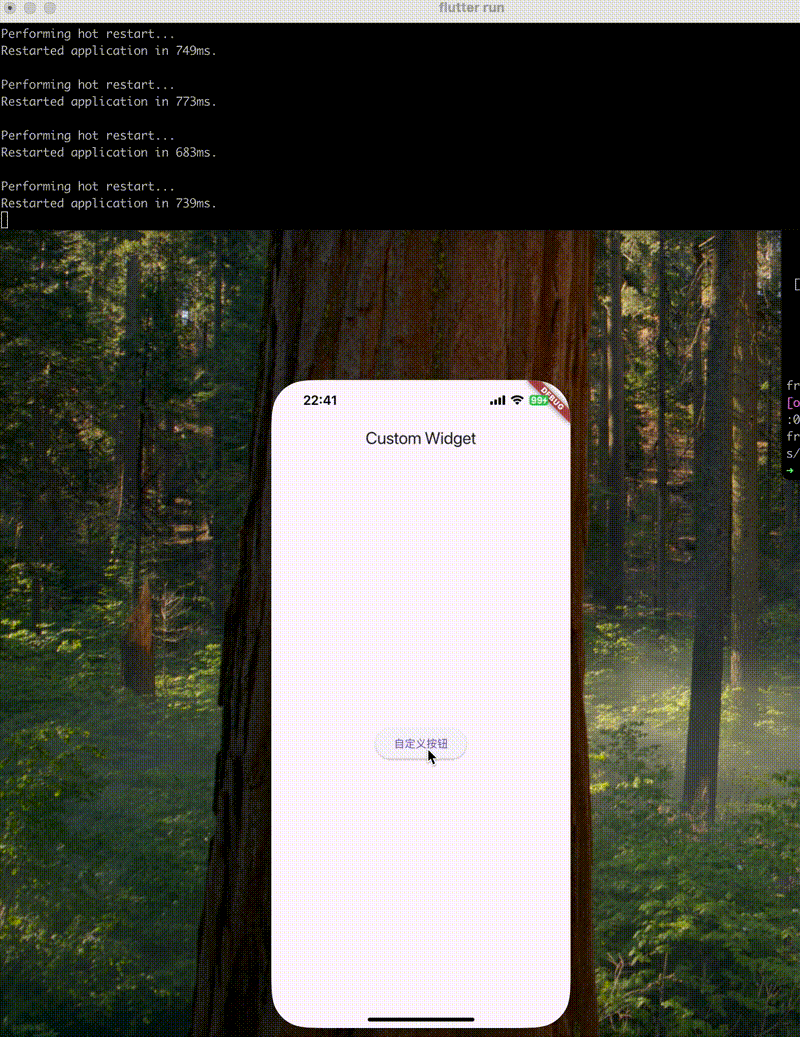
在UIKit中通过继承UIView来自定义组件,而在Flutter中定义自定义组件通常使用组合的方式
1
2
3
4
5
6
7
8
9
10
11
12
13
14
15
16
17
18
19
20
21
22
23
24
25
26
27
28
29
import "package:flutter/material.dart" ;void main() { runApp(MaterialApp(home: CustomWidget())); } class CustomWidget extends StatelessWidget const CustomWidget({super .key}); @override Widget build(BuildContext context) { return Scaffold( appBar: AppBar(title: Text("Custom Widget" )), body: Center(child: CustomButton("自定义按钮" )), ); } } class CustomButton extends StatelessWidget const CustomButton(this .label, {super .key}); final String label; @override Widget build(BuildContext context) { return ElevatedButton(onPressed: () {}, child: Text(label)); } }
管理依赖 iOS中使用CocoaPods管理时,可以通过配置Podfile文件。Flutter 是用pubspec.yaml 来管理依赖的库。iOS端需要的库写在Podfile里
1
2
3
4
5
6
7
8
9
10
11
12
13
14
15
16
17
18
19
20
21
22
23
24
25
26
27
28
29
30
31
32
33
34
35
36
37
38
39
40
41
42
43
44
45
46
47
48
49
50
51
52
53
54
55
56
57
58
59
60
61
62
63
64
65
66
67
68
69
70
/// 包名 此属性表示包名(package name),此属性是非常重要的,引入其他文件时需要使用此包名: /// import 'package:uikit/home_page.dart' ; name: uikit /// description 属性是一个可选配置属性,是对当前项目的介绍 description: "A new Flutter project." publish_to: 'none' // 此属性应用程序的版本和内部版本号,格式为 x.x.x+x,例如:1.0.0+1,这个版本号称为 语义版本号(semantic versioning ) // 版本号 + 前面到部分,叫做 version number,由 2 个小点隔开,后面的部分叫做 build number。 // 在 Android 中 version number 对应 versionName,build number 对应 versionCode,在 android/build.gradle 下有相关配置, version: 0.1 .0 /// Environment 属性下添加 Flutter 和 Dart 版本控制。 environment: sdk: ^3.7.2 /// dependencies 和 dev_dependencies 下包含应用程序所依赖的包,dependencies 和 dev_dependencies 就像其名字一样,dependencies 下的所有依赖会编译到项目中,而 dev_dependencies 仅仅是运行期间的包,比如自动生成代码的库 /// 可以通过四种方式依赖包 dependencies: /// 1 . 依赖pub.dev flutter: sdk: flutter /// 2 . 依赖本地库 flutter_local_pacakge: path: /path/to/flutter_local_package /// 3 . 依赖git repository /// url:github 地址 /// ref:表示git引用,可以是 commit hash, tag 或者 branch /// path:如果 git 仓库中有多个软件包,则可以使用此属性指定软件包 bloc: git: url:https://wwww.xxx.git ref: bloc_fixes_issue_100 path: package/bloc /// 4 . 依赖私有仓 dependencies: bloc: hosted: name: bloc url: http://your-package-server.com version: ^6.0.0 dev_dependencies: flutter_test: sdk: flutter flutter_lints: ^5.0.0 /// Flutter 下面的配置都是 Flutter 的相关配置。 flutter: /// 应用程序中包含Material Icons字体 uses-material-design: true /// 是对当前资源的配置,比如图片,字体等 //// 本地图片 assets: - images/a_dot_burr.jpeg - images/a_dot_ham.jpeg flutter: /// 插件 plugin: platforms: android: package: com.flutter.app_market pluginClass: AppMarketPlugin ios: pluginClass: AppMarketPlugin
参考
给 UIKit 开发者的 Flutter 指南 【Flutter 实战】pubspec.yaml 配置文件详解 No Directionality widget found错误背后的原理 Flutter - Dart中(.)、(..)、(…)语法使用