Hello world ⌘ + shift + p
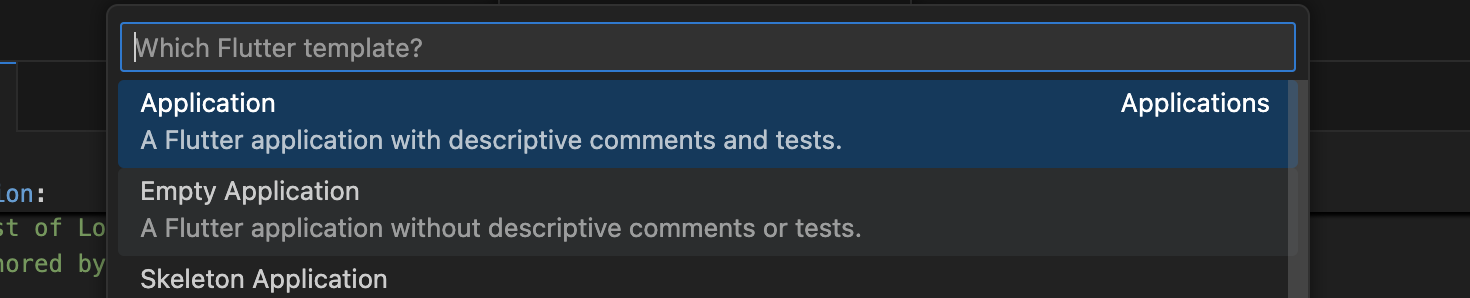
选择 Empty Application 模板
1 2 3 4 5 6 7 8 9 10 11 12 13 14 15 16 17 18 19 20 21 22 23 24 25 26 27 28 29 30 31 32 33 34 35 36 37 import 'package:flutter/material.dart' ;void main() { runApp(const MainApp()); } class MainApp extends StatelessWidget const MainApp({super .key}); @override Widget build(BuildContext context) { return const MaterialApp( home: Scaffold( body: Center( child: Text('Hello World' ), ), ), ); } }
build方法用于描述Widget的展示效果,当被添加到上下文的树 和Widget发生变化 时会触发这个方法。因为这个方法是高频操作所以不应该有副作用。
热重载(Hot reload) Flutter支持热重载,无需重启启动应用的情况下去重新刷新页面。通过将更新代码注入到运行的Dart虚拟机来实现热重载。在虚拟机使用新的字段和函数更新类后,Flutter框架自动重新构建widget。
修改后直接保存/点击调试那里的闪电图标能直接刷新
Flutter中的一切都是Widget,Widget分为有状态和无状态两种,在 Flutter 中每个页面都是一帧,无状态就是保持在那一帧,而有状态的 Widget 当数据更新时,其实是创建了新的 Widget,只是 State 实现了跨帧的数据同步保存。
比如上面的MainApp是无状态的Widget,而Scaffold是有状态的Widget
1
2
3
4
5
6
7
class MainApp extends StatelessWidget ... } class Scaffold extends StatefulWidget ... }
创建新组件时继承有状态还是无状态的Widget取决于是否要管理状态
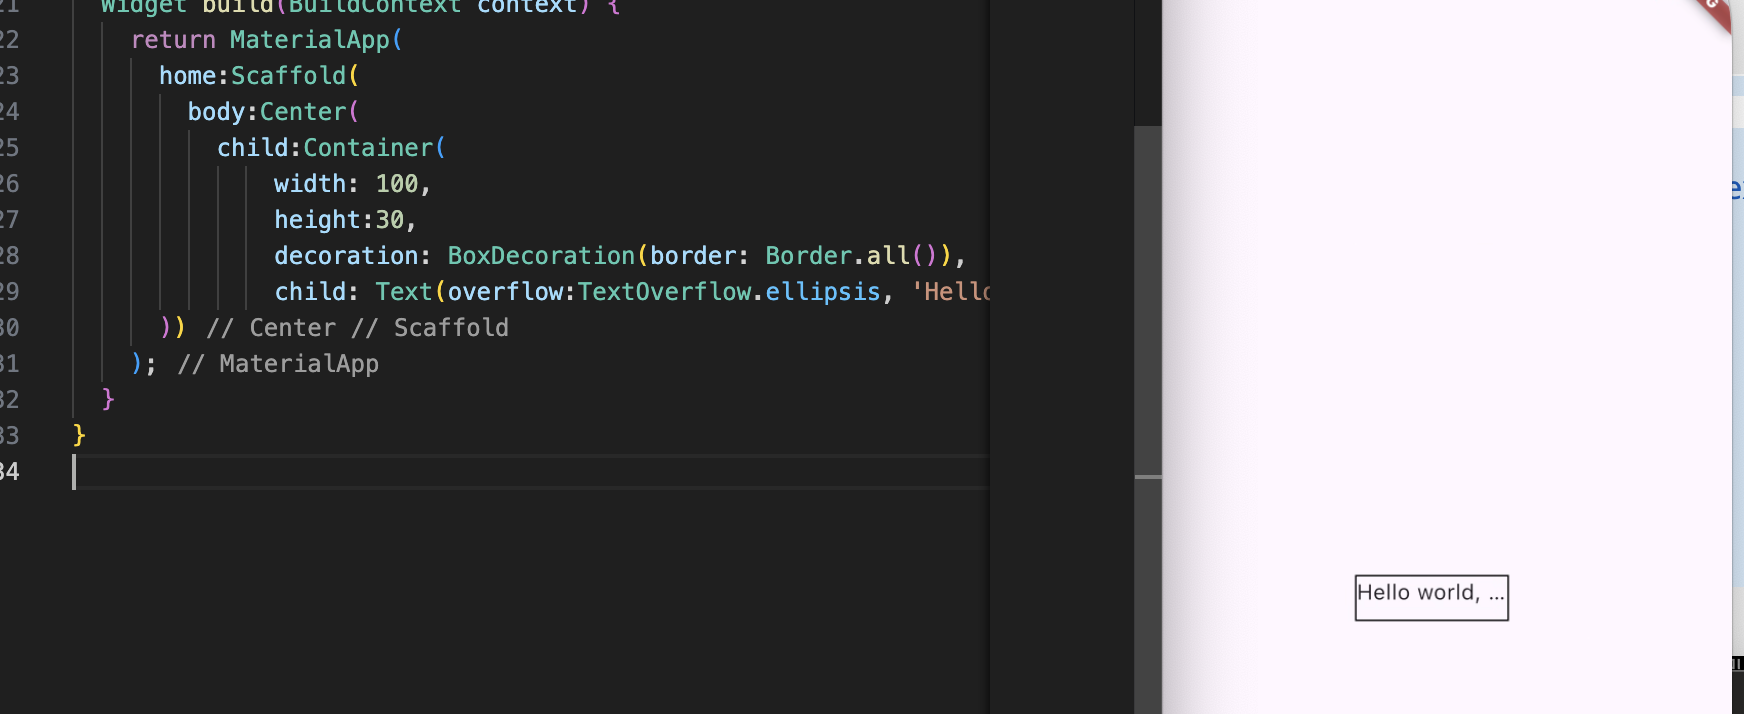
基础组件 Text Text 是现实单一样式的文本字符串组件。字符串可能跨多行中断,也可能全部显示在同一行上,取决于布局约束
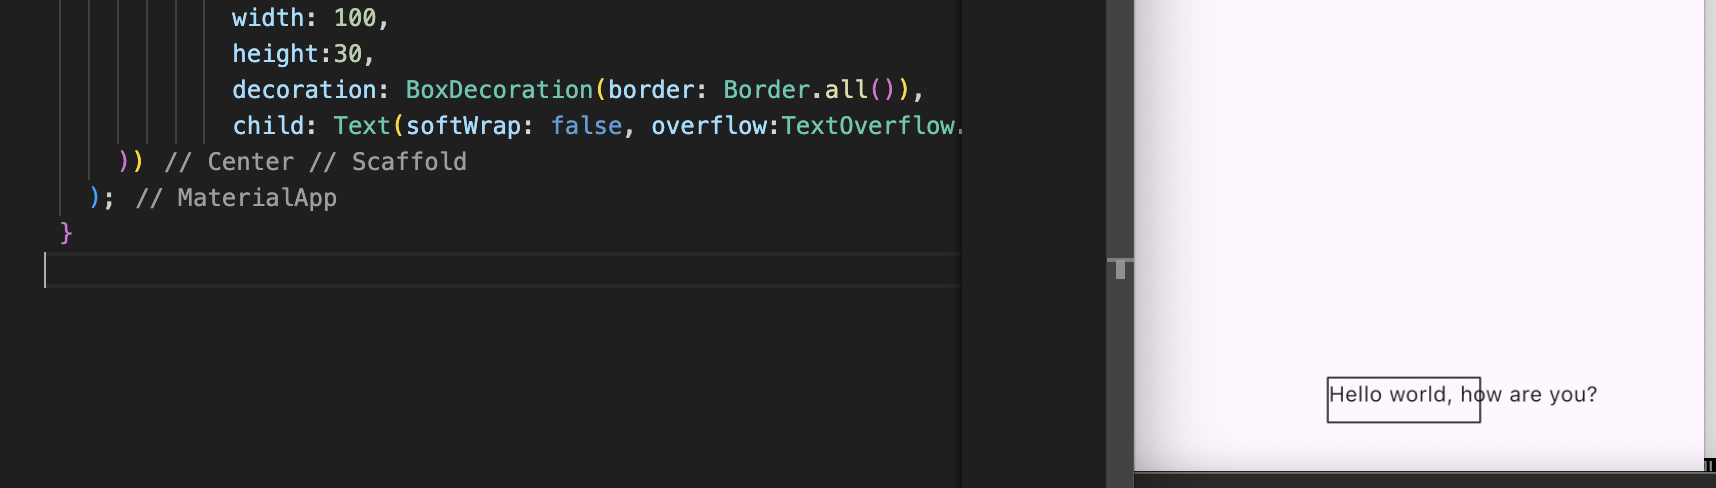
1
2
3
4
5
6
7
8
9
10
11
12
13
14
15
16
17
Widget build(BuildContext context) { return MaterialApp( home:Scaffold( body:Center( child:Container( width: 100 , height:30 , decoration: BoxDecoration(border: Border.all()), child: Text(overflow:TextOverflow.ellipsis, 'Hello world, how are you?' )) )) ); }
TextOverflow.ellipsis的效果
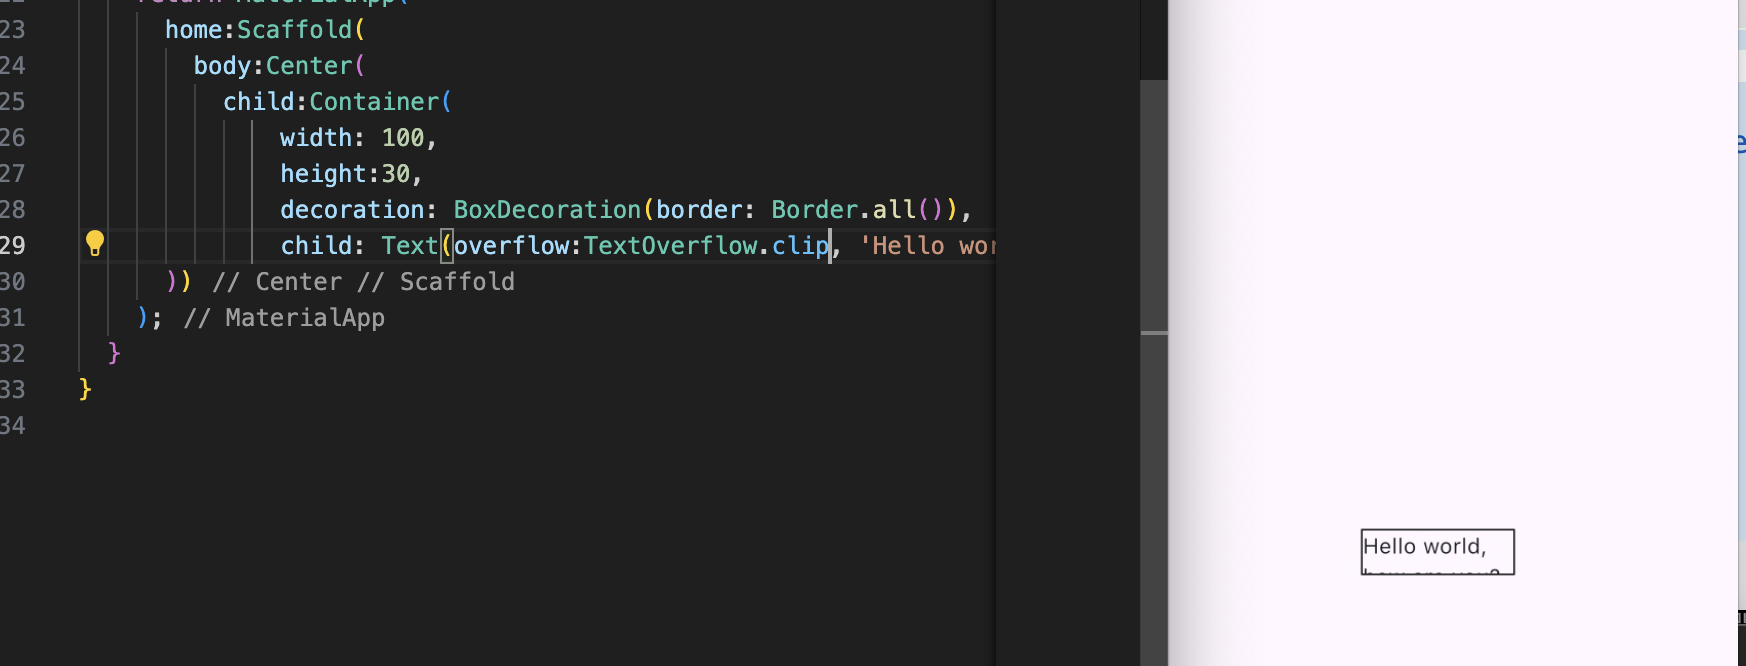
TextOverflow.clip 的效果
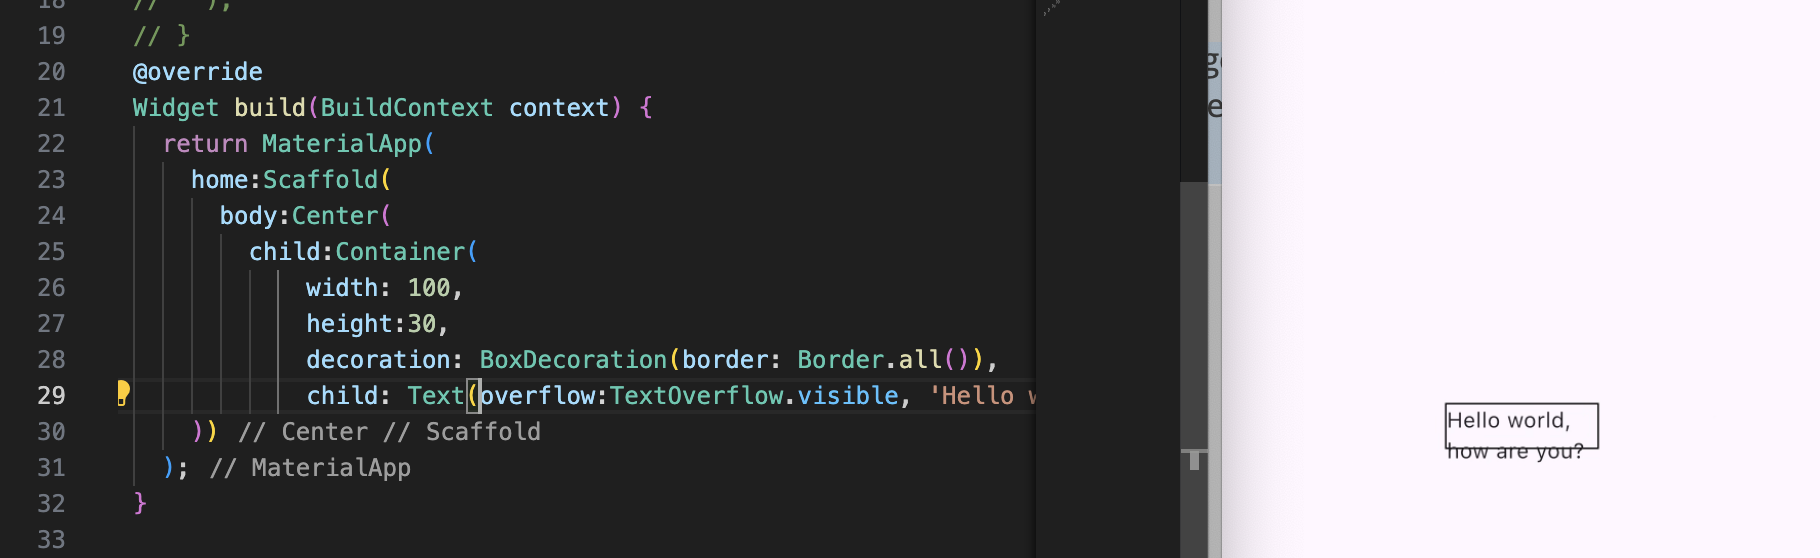
TextOverflow.visible 的效果
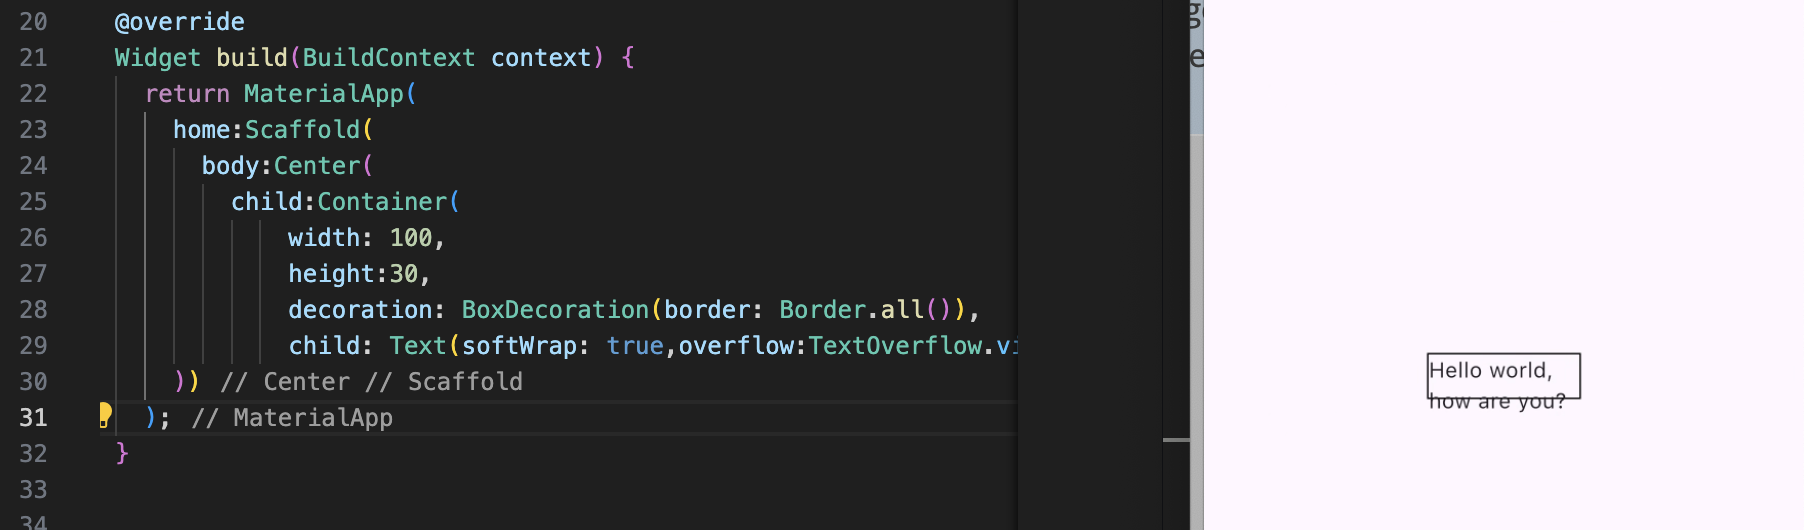
maxLines 控制最大行数softWrap 控制是否换行
当overflow是TextOverflow.visible时
softWrap: false
softWrap: true
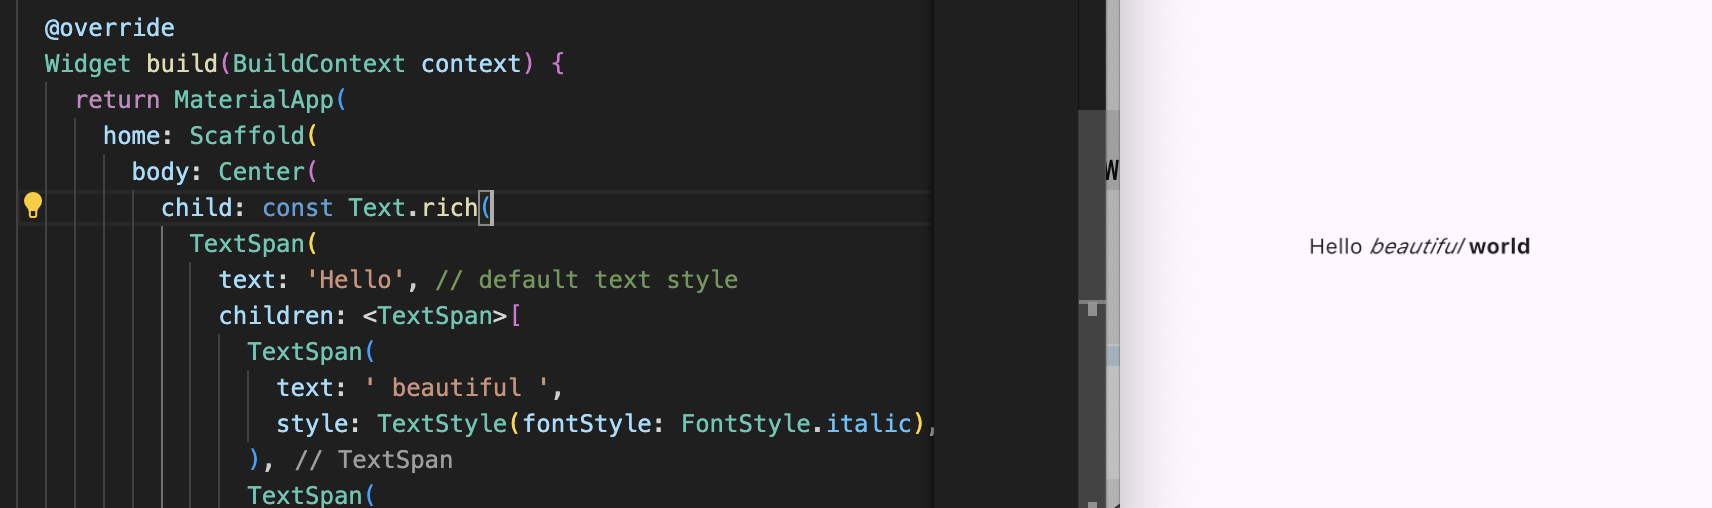
Text.rich 使用Text.rich构造器,Text组件可以在一个段落中展示不同的样式
1
2
3
4
5
6
7
8
9
10
11
12
13
14
15
16
17
18
19
20
21
22
23
Widget build(BuildContext context) { return MaterialApp( home: Scaffold( body: Center( child: const Text.rich( TextSpan( text: 'Hello' , children: <TextSpan>[ TextSpan( text: ' beautiful ' , style: TextStyle(fontStyle: FontStyle.italic), ), TextSpan( text: 'world' , style: TextStyle(fontWeight: FontWeight.bold), ), ], ), ), ), ), ); }
关于Text的交互 用GestureDetector widget包装Text,然后在GestureDetector.onTap中处理点击事件。或者使用TextButton来代替
Row,Column,Stack,Container
Container: 只有一个子 Widget。默认充满,包含了padding、margin、color、宽高、decoration 等配置
Row: 可以有多个子 Widget。水平布局。
Column: 可以有多个子 Widget。垂直布局。
Stack: 可以有多个子 Widget。 子Widget堆叠在一起。
Center: 只有一个子 Widget。只用于居中显示,常用于嵌套child,给child设置居中。
Padding: 只有一个子 Widget。只用于设置Padding,常用于嵌套child,给child设置padding。
Expanded: 只有一个子 Widget。在 Column 和 Row 中充满。
ListView: 可以有多个子Widget,列表布局
1 2 3 4 5 6 7 8 9 10 11 12 13 14 15 16 17 18 19 20 21 Row( children: [ const IconButton( icon: Icon(Icons.menu), tooltip: 'Navigation menu' , onPressed: null , ), Expanded(child: title), const IconButton( icon: Icon(Icons.search), tooltip: 'Search' , onPressed: null , ), ], )
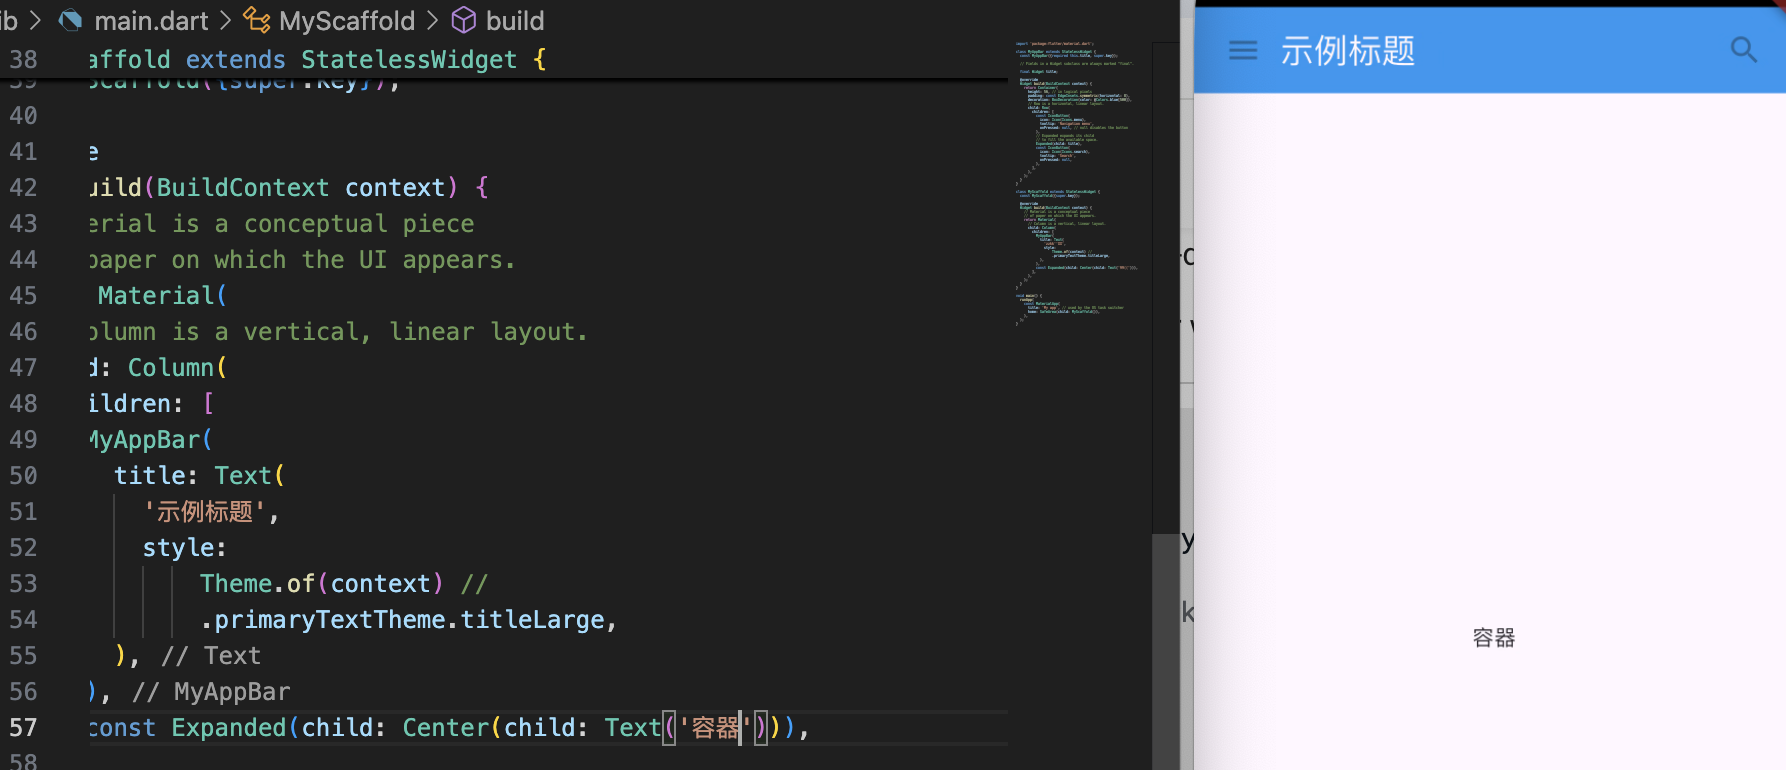
1 2 3 4 5 6 7 8 9 10 11 12 13 14 Column( children: [ MyAppBar( title: Text( '示例标题' , style: Theme.of(context) .primaryTextTheme.titleLarge, ), ), const Expanded(child: Center(child: Text('容器' ))), ], )
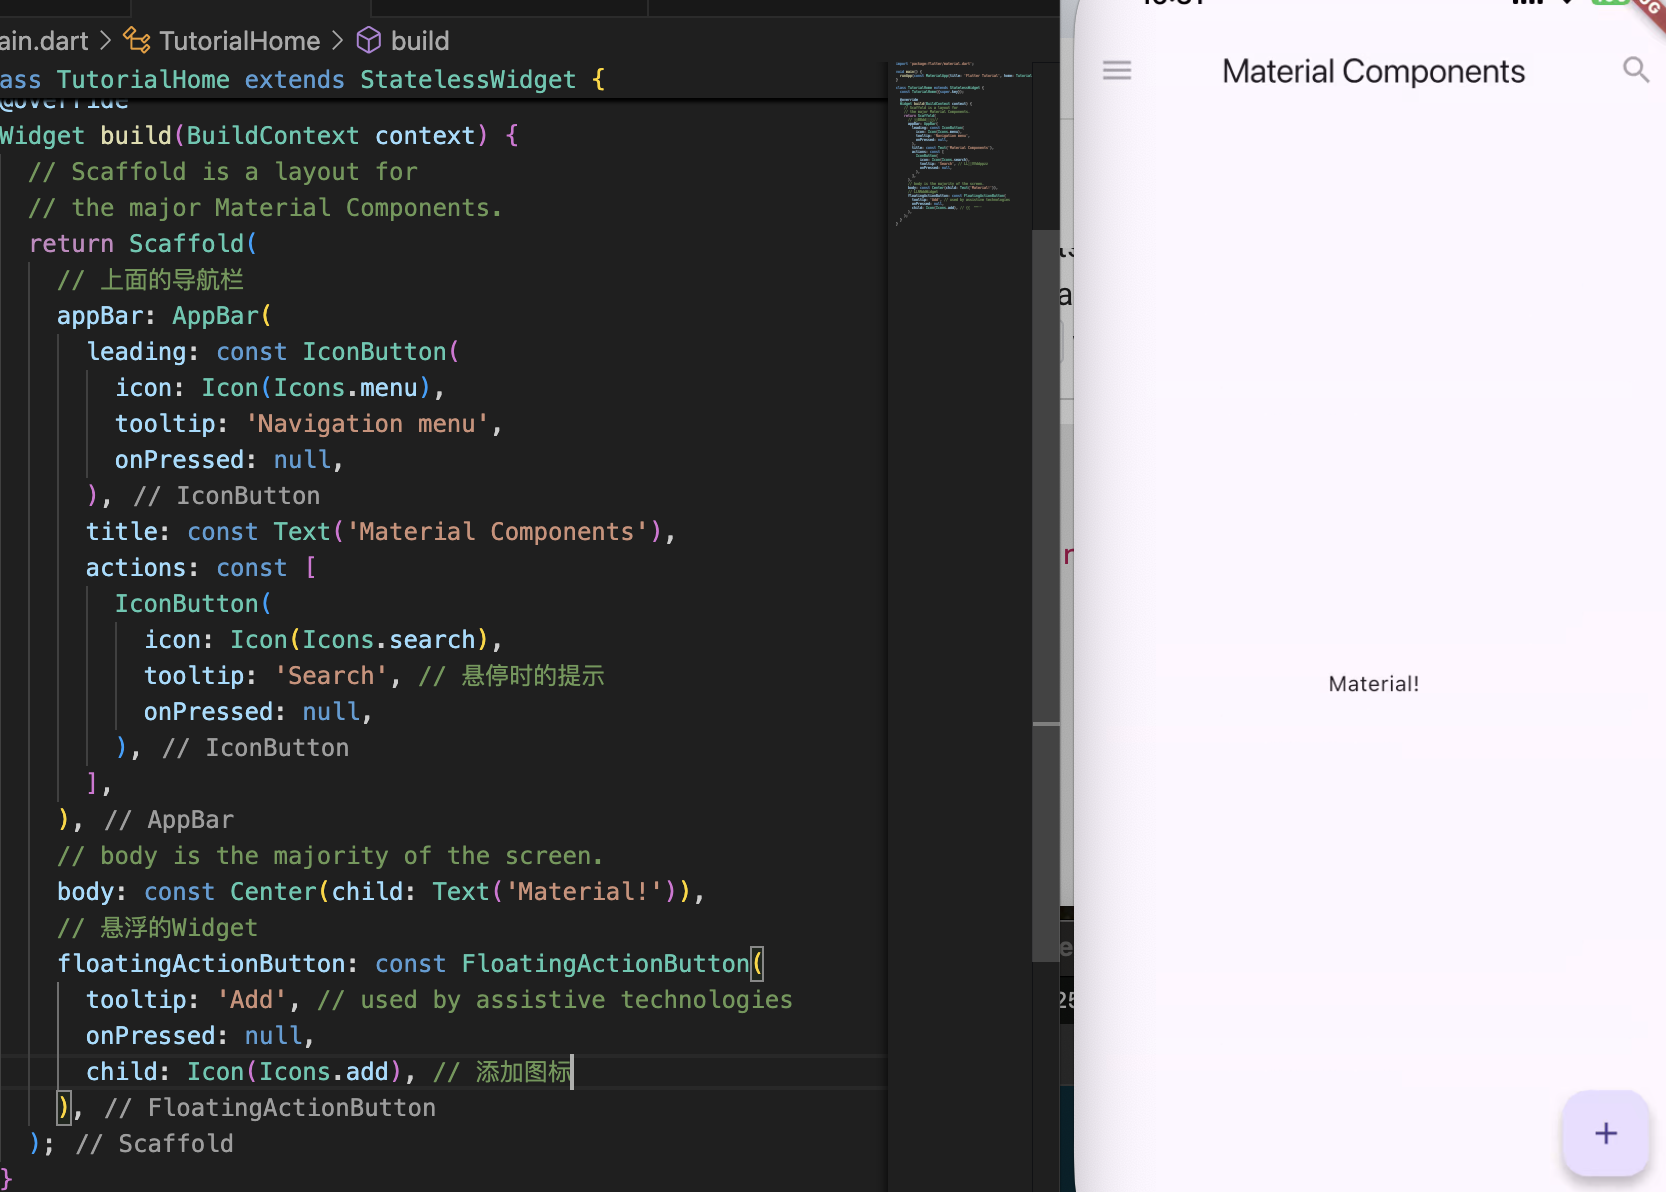
要使用material中这些预定义图标,需要将工程中的pubspec.yaml文件里的uses-material-design字段设置为true
使用Material组件 1 2 3 4 5 6 7 8 9 10 11 12 13 14 15 16 17 18 19 20 21 22 23 24 25 26 27 28 29 30 31 32 33 34 35 36 37 38 39 import 'package:flutter/material.dart' ;void main() { runApp(const MaterialApp(title: 'Flutter Tutorial' , home: TutorialHome())); } class TutorialHome extends StatelessWidget const TutorialHome({super .key}); @override Widget build(BuildContext context) { return Scaffold( appBar: AppBar( leading: const IconButton( icon: Icon(Icons.menu), tooltip: 'Navigation menu' , onPressed: null , ), title: const Text('Material Components' ), actions: const [ IconButton( icon: Icon(Icons.search), tooltip: 'Search' , onPressed: null , ), ], ), body: const Center(child: Text('Material!' )), floatingActionButton: const FloatingActionButton( tooltip: 'Add' , onPressed: null , child: Icon(Icons.add), ), ); } }
使用Scaffold和AppBar替换原来自定义的MyScaffold和MyAppBar
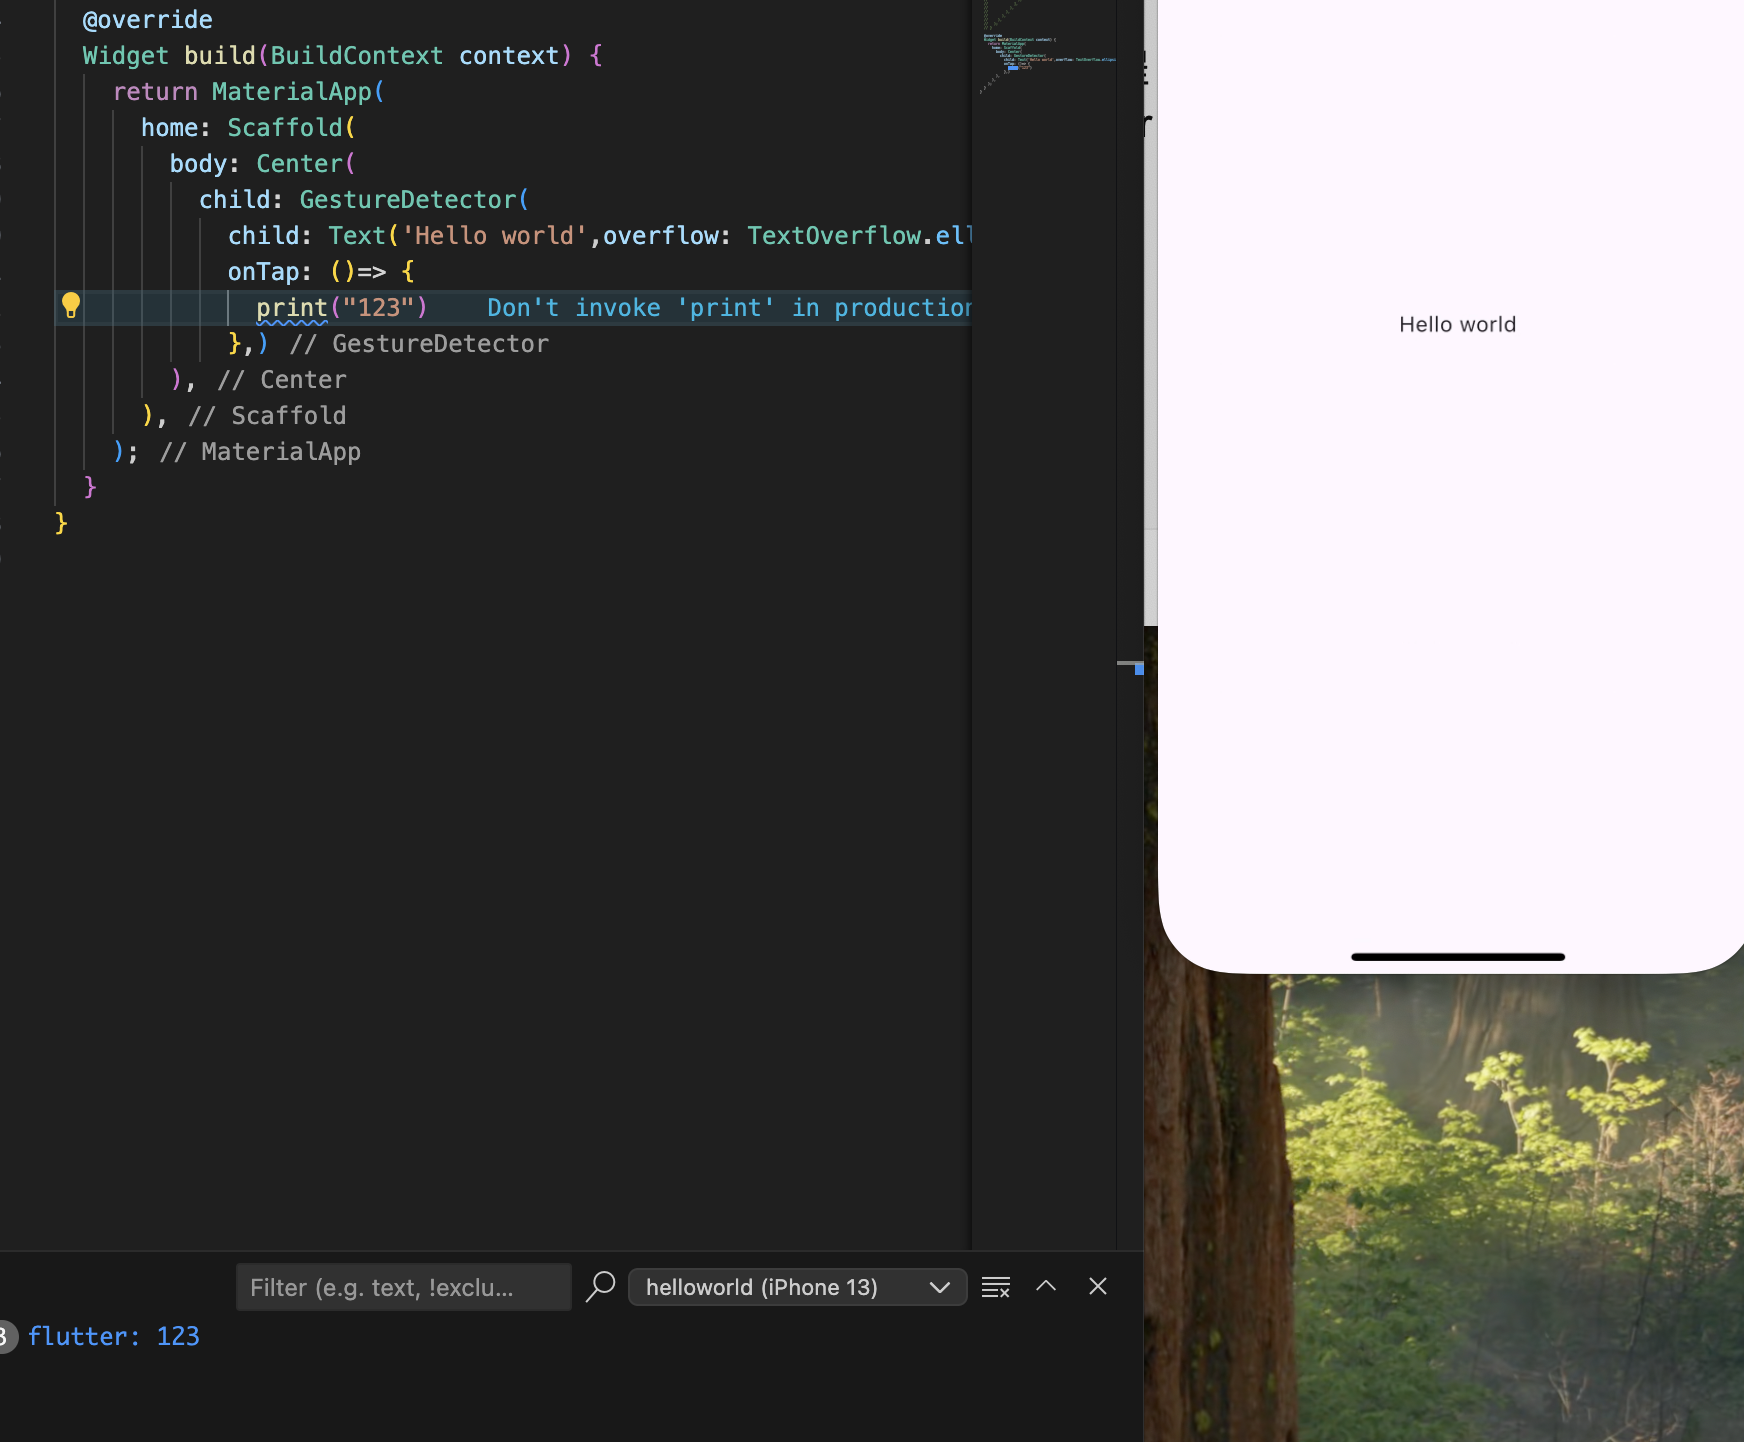
手势处理 1 2 3 4 5 6 7 8 9 10 11 12 13 14 15 @override Widget build(BuildContext context) { return MaterialApp( home: Scaffold( body: Center( child: GestureDetector( child: Text('Hello world' ,overflow: TextOverflow.ellipsis,), onTap: ()=> { print ("123" ) },) ), ), ); }
更改小组件以响应输入 UI通常需要对用户的输入进行响应,比如点外卖时根据用户选择菜品计算最后的价格, Flutter中使用StatefulWidgets来处理这种场景。
继承StatefulWidget,重写createState方法
1
2
3
4
5
6
7
8
class Counter extends StatefulWidget const Counter({super .key}); @override State<Counter> createState() => _CounterState(); }
所有的类都隐式定义成了一个接口。因此,任意类都可以作为接口被实现 ,定义一个继承State并实现Counter类的方法
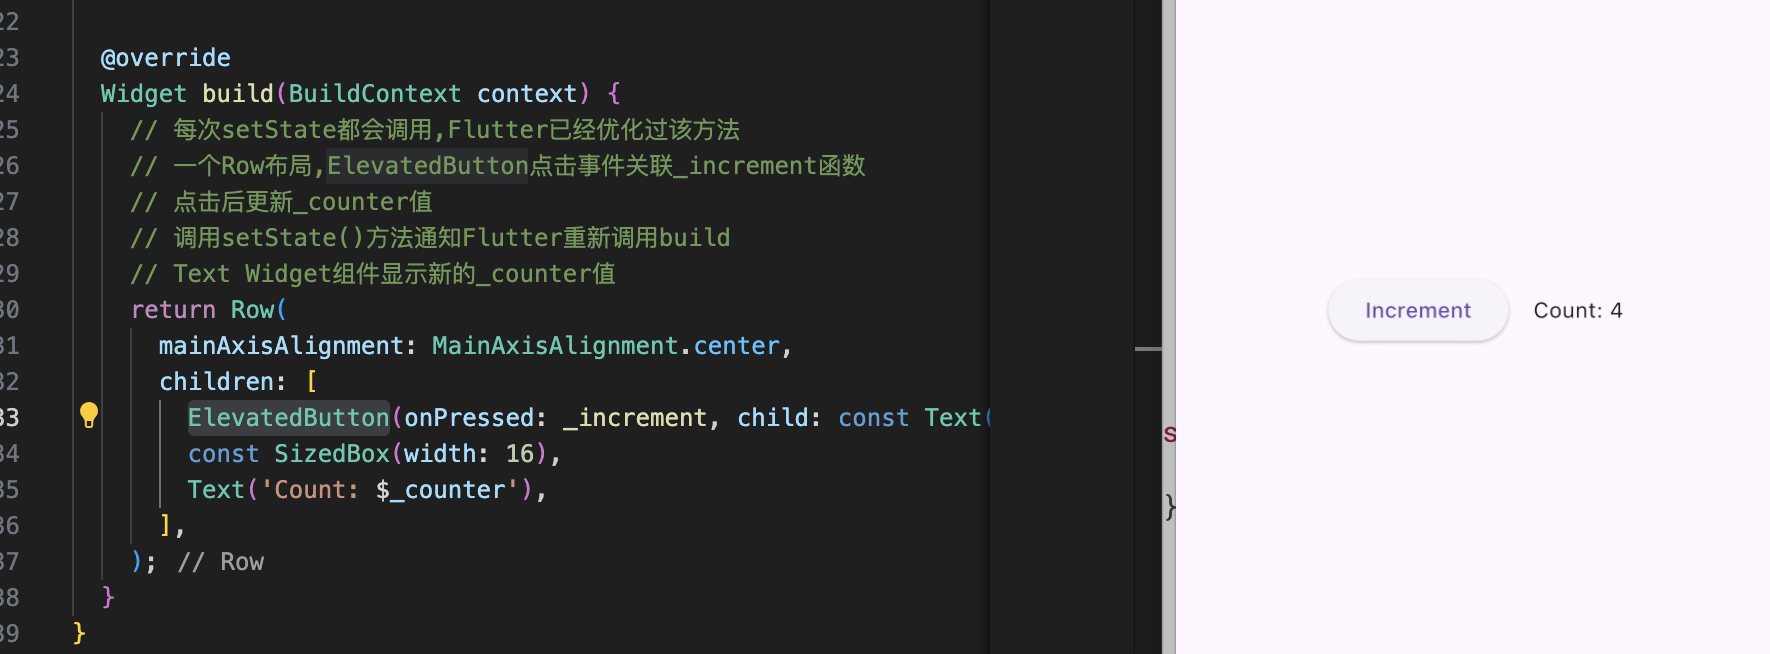
1 2 3 4 5 6 7 8 9 10 11 12 13 14 class _CounterState extends State <Counter > int _counter = 0 ; void _increment() { setState(() { _counter++; }); }
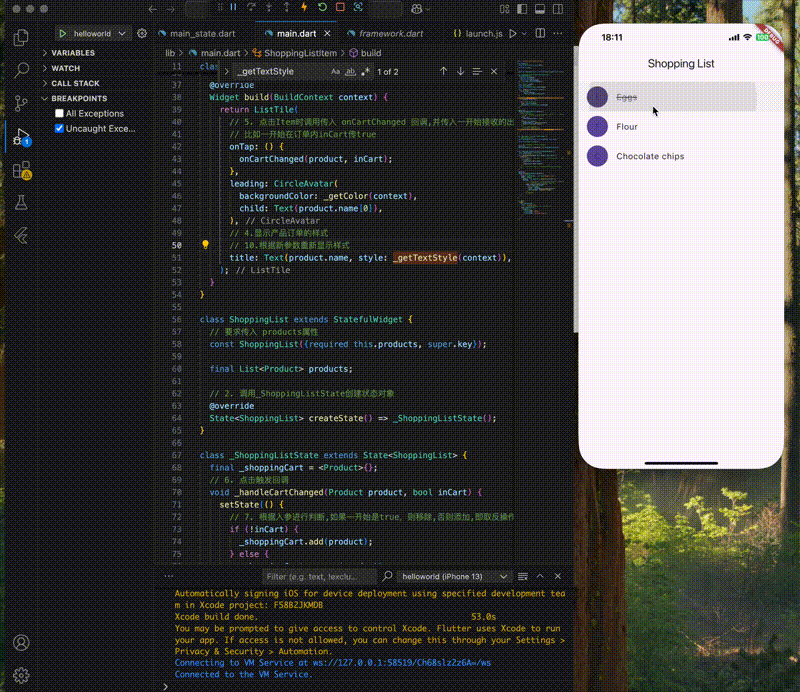
合并的示例 1 2 3 4 5 6 7 8 9 10 11 12 13 14 15 16 17 18 19 20 21 22 23 24 25 26 27 28 29 30 31 32 33 34 35 36 37 38 39 40 41 42 43 44 45 46 47 48 49 50 51 52 53 54 55 56 57 58 59 60 61 62 63 64 65 66 67 68 69 70 71 72 73 74 75 76 77 78 79 80 81 82 83 84 85 86 87 88 89 90 91 92 93 94 95 96 97 98 99 100 101 102 103 104 105 106 107 108 109 110 111 112 113 114 115 116 117 import 'package:flutter/material.dart' ;class Product const Product({required this .name}); final String name; } typedef CartChangedCallback = Function (Product product, bool inCart);class ShoppingListItem extends StatelessWidget ShoppingListItem({ required this .product, required this .inCart, required this .onCartChanged, }) : super (key: ObjectKey(product)); final Product product; final bool inCart; final CartChangedCallback onCartChanged; Color _getColor(BuildContext context) { return inCart ? Colors.black54 : Theme.of(context).primaryColor; } TextStyle? _getTextStyle(BuildContext context) { if (!inCart) return null ; return const TextStyle( color: Colors.black54, decoration: TextDecoration.lineThrough, ); } @override Widget build(BuildContext context) { return ListTile( onTap: () { onCartChanged(product, inCart); }, leading: CircleAvatar( backgroundColor: _getColor(context), child: Text(product.name[0 ]), ), title: Text(product.name, style: _getTextStyle(context)), ); } } class ShoppingList extends StatefulWidget const ShoppingList({required this .products, super .key}); final List <Product> products; @override State<ShoppingList> createState() => _ShoppingListState(); } class _ShoppingListState extends State <ShoppingList > final _shoppingCart = <Product>{}; void _handleCartChanged(Product product, bool inCart) { setState(() { if (!inCart) { _shoppingCart.add(product); } else { _shoppingCart.remove(product); } }); } @override Widget build(BuildContext context) { return Scaffold( appBar: AppBar(title: const Text('Shopping List' )), body: ListView( padding: const EdgeInsets.symmetric(vertical: 8 ), children: widget.products.map((product) { return ShoppingListItem( product: product, inCart: _shoppingCart.contains(product), onCartChanged: _handleCartChanged, ); }).toList(), ), ); } } void main() { runApp( const MaterialApp( title: 'Shopping App' , home: ShoppingList( products: [ Product(name: 'Eggs' ), Product(name: 'Flour' ), Product(name: 'Chocolate chips' ), ], ), ), ); }
响应组件的生命周期相关事件 Flutter调用createState方法后,会将state对象添加到渲染树并且调用state对象的initState(),可以重写这个方法中配置动画或准备订阅平台相关的服务,重写方法开始要先调用super.initState。当state对象不再需要时,Flutter会调用对象的dispose方法来执行清理操作,比如取消定时器,取消订阅,同样在重写方法中也要先调用super.dispose
其它 包缓存地址 参考
Flutter Flutter-UI Flutter - 我给官方提PR,解决run命令卡住问题 😃 Day16 - Flutter - 屏幕适配