ReactNative 入门体验

环境

macOS Mojave Version 10.14.3
Xcode 10.1
iPhone 5s 10.0.1
node v11.10.0
npm 6.7.0
React Native 0.58
react 16.6.3

新建ReactNative项目

1
2
brew install node
brew install watchman

安装React Native命令行工具

1
npm install -g react-native-cli

安装Xcode及命令行相关工具


或者

1
2
3
4
5
6
7
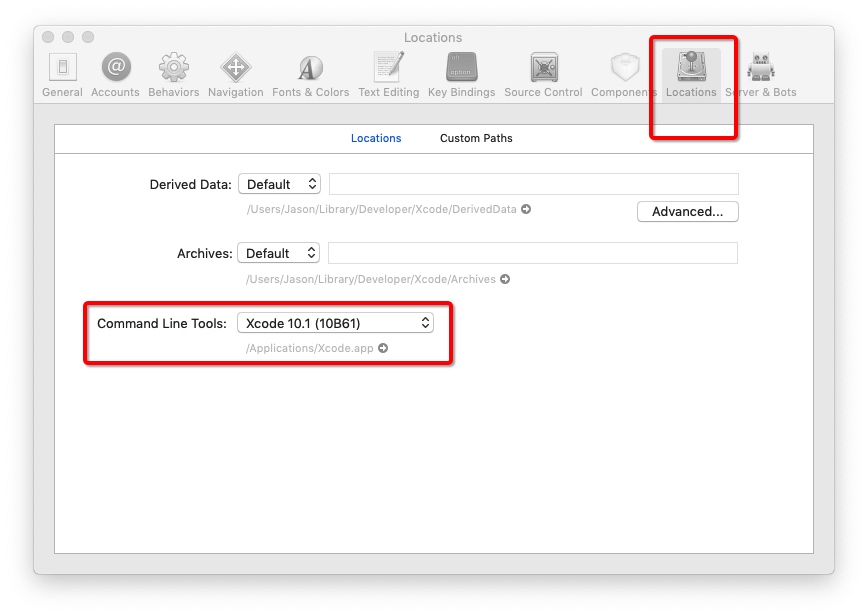
## man xcode-select
## xcode-select - Manages the active developer directory for Xcode and BSD
## tools.
## --install
## Opens a user interface dialog to request automatic installation
## of the command line developer tools.
xcode-select --install

详情参考英文-doc 链接2/中文-doc 链接11

创建新应用

命令行

1
react-native init AwesomeProject

WebStorm

node版本过低可能出现Command yarn add react-native --exact` failed.,可参考Upgrade Node.js to the latest version on Mac OS升级node

观察日志的输出生成工程执行的是

1
/Users/`userName`/.nvm/versions/node/v11.10.0/bin/node /Users/`userName`/.nvm/versions/node/v11.10.0/lib/node_modules/react-native-cli/index.js init AwesomeProject

查看react-native位置

1
2
3
which react-native
## 输出
/Users/`userName`/.nvm/versions/node/v11.10.0/bin/react-native

运行React Native应用

同样根据窗口日志的输出,iOS运行的方法可以用命令行或直接使用Xcode打开运行

使用命令行方式

1
2
3
4
5
6
7
8
## cd到工程目录下
cd /Users/`userName`/WebstormProjects/AwesomeProject
## 执行
react-native run-ios

Found Xcode project AwesomeProject.xcodeproj
... bla bla bla
> Running script 'Install Third Party'

启动模拟器,然后安装下载第三方的组件,下载的脚本是scripts/ios-install-third-party.sh

1
2
3
4
5
6
7
8
if [ -d "$HOME/.rncache" ]; then
cachedir="$HOME/.rncache" # react-native 0.57.8 and older
else
cachedir="$HOME/Library/Caches/com.facebook.ReactNativeBuild"
fi
mkdir -p "$cachedir"
...

缓存目录旧版在家目录的.rncache,如果存在该目录,则下载的库就会安装在此处,若网络原因无法下载,可参考iOS RN 0.45以上版本所需的第三方编译库(boost等),手动下载即可

但是,运行失败了

1
2
3
4
5
6
7
8
9
10
11
12
13
14
15
16
17
18
Installing build/Build/Products/Debug-iphonesimulator/AwesomeProject.app
An error was encountered processing the command (domain=NSPOSIXErrorDomain, code=22):
Failed to install the requested application
The bundle identifier of the application could not be determined.
Ensure that the application's Info.plist contains a value for CFBundleIdentifier.
Print: Entry, ":CFBundleIdentifier", Does Not Exist

Command failed: /usr/libexec/PlistBuddy -c Print:CFBundleIdentifier build/Build/Products/Debug-iphonesimulator/AwesomeProject.app/Info.plist
Print: Entry, ":CFBundleIdentifier", Does Not Exist


Error: Command failed: /usr/libexec/PlistBuddy -c Print:CFBundleIdentifier build/Build/Products/Debug-iphonesimulator/AwesomeProject.app/Info.plist
Print: Entry, ":CFBundleIdentifier", Does Not Exist

at checkExecSyncError (child_process.js:637:11)
at Object.execFileSync (child_process.js:655:13)
at Promise.then (/Users/Jason/WebstormProjects/AwesomeProject/node_modules/react-native/local-cli/runIOS/runIOS.js:208:5)
at processTicksAndRejections (internal/process/next_tick.js:81:5)

再往上看,编译时就已经失败了

1
2
3
4
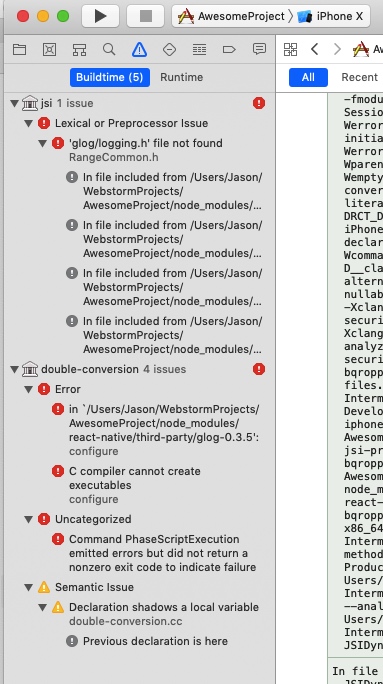
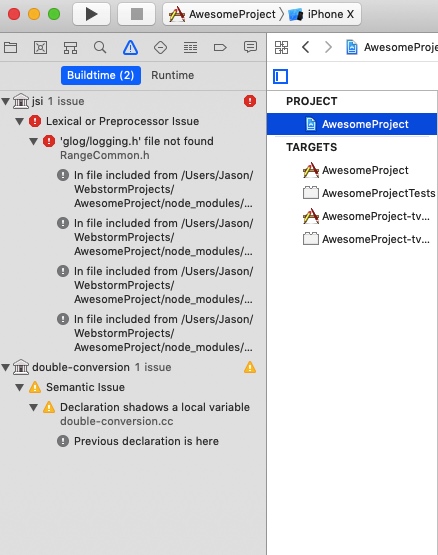
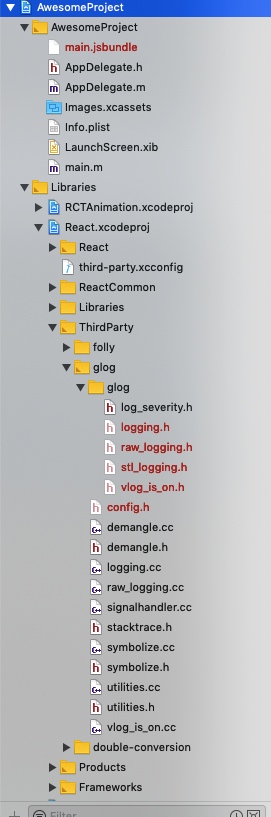
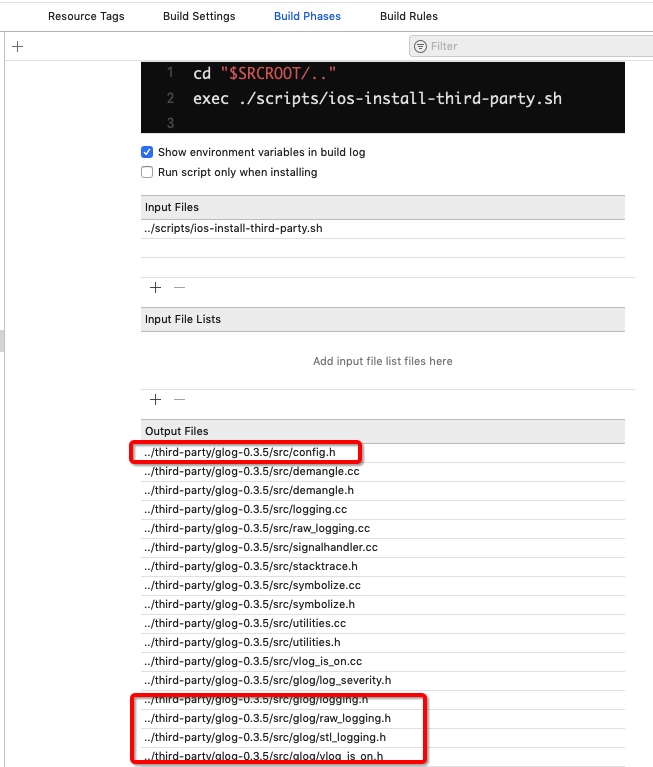
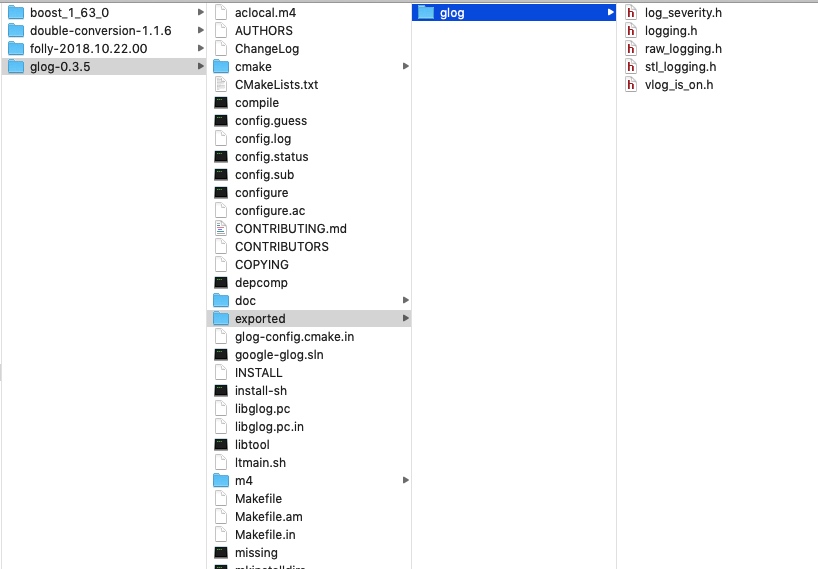
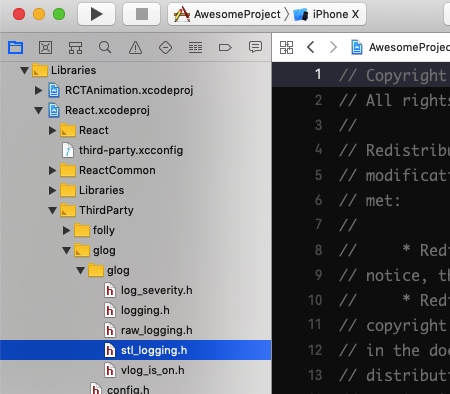
❌  /Users/Jason/WebstormProjects/AwesomeProject/node_modules/react-native/third-party/folly-2018.10.22.00/folly/detail/RangeCommon.h:22:10: 'glog/logging.h' file not found

#include <glog/logging.h>
^

Xcode 的方式试试

选择模拟器并编译

除了jsiRangeCommon.hglog/logging.h找不到以外,这个与使用命令行运行时是一样,又多了三个错误,剩下的3个错误,参考Supporting Xcode 10 and the new Xcode build system,RN的一个issue,调整工程的编译系统,再次编译

现在错误变成一样了,都是文件找不到,来看看为什么找不到,React.xcodeproj > ThirdParty > glog > glog下,确实缺少文件

jsi依赖于double-conversion
double-conversion执行了ios-install-third-party.sh,并未能成功输出需要的头文件

1
2
3
4
5
6
7
8
9
10
11
12
13
14
15
16
17
18
19
20
21
22
23
24
25
26
27
28
29
## ios-install-third-party.sh
function fetch_and_unpack () {
file=$1
url=$2
hash=$3
cmd=$4
...
if [ "$fetched" = "yes" ] || [ ! -f "third-party/$dir/.installed" ]; then
(cd third-party;
## <2>
rm -rf "$dir"
echo Unpacking "$cachedir/$file"...
if ! tar zxf "$cachedir/$file"; then
file_fail "$cachedir/$file" "Unpacking '$cachedir/$file' failed"
fi
cd "$dir"
eval "${cmd:-true}" && touch .installed)
fi
}


## <1>
mkdir -p third-party

SCRIPTDIR=$(dirname "$0")

fetch_and_unpack glog-0.3.5.tar.gz https://github.com/google/glog/archive/v0.3.5.tar.gz 61067502c5f9769d111ea1ee3f74e6ddf0a5f9cc "\"$SCRIPTDIR/ios-configure-glog.sh\""

...

cdthird-party目录,将缓存目录下的包解压缩,并执行对应的指令,比如glog-0.3.5就执行

1
$SCRIPTDIR/ios-configure-glog.sh
1
2
3
4
5
6
7
8
9
10
11
12
13
14
15
### ios-configure-glog.sh

./configure --host arm-apple-darwin

# Fix build for tvOS
cat << EOF >> src/config.h
...
# Prepare exported header include
EXPORTED_INCLUDE_DIR="exported/glog"
mkdir -p exported/glog
cp -f src/glog/log_severity.h "$EXPORTED_INCLUDE_DIR/"
cp -f src/glog/logging.h "$EXPORTED_INCLUDE_DIR/"
cp -f src/glog/raw_logging.h "$EXPORTED_INCLUDE_DIR/"
cp -f src/glog/stl_logging.h "$EXPORTED_INCLUDE_DIR/"
cp -f src/glog/vlog_is_on.h "$EXPORTED_INCLUDE_DIR/"

执行该脚本执行configure并创建exported/glog目录,然后将configure过程中生成的文件cp到该目录,执行ios-configure-glog.sh

结果如下:

这是正常的,但是⌘ + B再次编译后又报了相同的错误,对比Xcode与终端执行的日志结果发现,Xcode执行时checking whether the C compiler works... 失败了

查找

关于'glog/logging.h' file not found,根据‘glog/logging.h’ file not found得到的解决方案是

1
2
cd node_modules/react-native/third-party/glog-0.3.5
sh ../../scripts/ios-configure-glog.sh

上面已经执行过了,用Xcode重新编译还会出现问题

参考react-native/pull/23511

手动修改ios-configure-glog.sh文件

1
2
3
...
export CXX="$(xcrun -find -sdk $PLATFORM_NAME cc) -arch $CURRENT_ARCH -isysroot $(xcrun -sdk $PLATFORM_NAME --show-sdk-path)"
...

试了以后,用Xcode编译依然报错ㄟ( ▔, ▔ )ㄏ

为什么有../../

在上面的代码的<1>处可知,../..后,当前位置会在.../react-native目录下,要在该目录下创建third-party目录,同时又要保证SCRIPTDIR能正确定位到ios-configure-glog.sh去执行。

这样做后还是失败,因为<2>处移除后,重新执行,同样因为configure失败导致无法生成.h文件。

解决方法

在终端根据上面提到的方法执行ios-install-third-party.sh

1
2
# 注释下面这句
# fetch_and_unpack glog-0.3.5.tar.gz https://github.com/google/glog/archive/v0.3.5.tar.gz 61067502c5f9769d111ea1ee3f74e6ddf0a5f9cc "\"$SCRIPTDIR/ios-configure-glog.sh\""

避免去删除glog这个包,然后再用Xcode进行编译就正常了,运行时模拟器下还是会崩溃,真机能正常运行。

资源地址获取不正确,有网络代理工具的情况时,比如SS,将其调成自动代理或关闭

Hello world

修改App.js

1
2
3
4
5
6
7
8
9
10
11
12
13
14
15
16
export default class App extends Component<Props> {
render() {
// return (
// <View style={styles.container}>
// <Text style={styles.welcome}>Welcome to React Native!</Text>
// <Text style={styles.instructions}>To get started, edit App.js</Text>
// <Text style={styles.instructions}>{instructions}</Text>
// </View>
// );
return (
<View style={{ flex: 1, justifyContent: "center", alignItems: "center",backgroundColor: '#F5FCFF', }}>
<Text>Hello world!</Text>
</View>
);
}
}

要使用backgroundColor: '#F5FCFF'设置背景色

集成ReactNative到已有项目

建立目录结构

新建一个目录去集成RN工程,将Xcode工程复制到RN下的ios子目录

安装JavaScript依赖库

RN工程根目录下,创建package.json文件

1
2
3
4
5
6
7
8
{
"name": "AnNativeApp",
"version": "0.0.1",
"private": true,
"scripts": {
"start": "node node_modules/react-native/local-cli/cli.js start"
}
}
1
2
3
4
5
6
7
8
9
10
11
12
13
## 若 yarn 不存在,安装
## brew install yarn

yarn add react-native

## 安装React
# warning " > react-native@0.58.5" has unmet peer dependency "react@16.6.3".
# 而且原来使用``WebStorm``生成的``package.json``中包含的``react``和``react-native``,所以``react``也选16.6.3
# "dependencies": {
# "react": "16.6.3",
# "react-native": "0.58.5"
# },
yarn add react@version_printed_above

node_modules添加到.gitignore文件中

1
2
# 将``WebStorm``生成的.gitignore复制到``RN``根目录下即可
cp .gitignore ~/Desktop/AnNativeApp/

使用CocoaPods集成

ios目录下,初始化pod init配置

1
pod init
1
2
3
4
5
6
7
8
9
10
11
12
13
14
15
16
17
18
19
20
21
22
23
24
25
26
27
28
29
30
31
32
33
34
35
36
platform :ios, '9.0'

target 'AnNativeApp' do
# Uncomment the next line if you're using Swift or would like to use dynamic frameworks
# use_frameworks!
# Your 'node_modules' directory is probably in the root of your project,
# but if not, adjust the `:path` accordingly
pod 'React', :path => '../node_modules/react-native', :subspecs => [
'Core',
'CxxBridge', # Include this for RN >= 0.47
'DevSupport', # Include this to enable In-App Devmenu if RN >= 0.43
'RCTText',
'RCTNetwork',
'RCTWebSocket', # Needed for debugging
'RCTAnimation', # Needed for FlatList and animations running on native UI thread
# Add any other subspecs you want to use in your project
]
# Explicitly include Yoga if you are using RN >= 0.42.0
pod 'yoga', :path => '../node_modules/react-native/ReactCommon/yoga'

# Third party deps podspec link
pod 'DoubleConversion', :podspec => '../node_modules/react-native/third-party-podspecs/DoubleConversion.podspec'
pod 'glog', :podspec => '../node_modules/react-native/third-party-podspecs/glog.podspec'
pod 'Folly', :podspec => '../node_modules/react-native/third-party-podspecs/Folly.podspec'

target 'AnNativeAppTests' do
inherit! :search_paths
# Pods for testing
end

target 'AnNativeAppUITests' do
inherit! :search_paths
# Pods for testing
end

end
1
pod install

可能会碰到如下的错误

1
2
3
4
5
6
7
8
9
10
11
...
Installing boost-for-react-native (1.63.0)

[!] Error installing boost-for-react-native
[!] /usr/local/bin/git clone https://github.com/react-native-community/boost-for-react-native.git /var/folders/lk/znn1qp4925j412wt4t_qkplc0000gn/T/d20190222-11171-yp7x2 --template= --single-branch --depth 1 --branch v1.63.0-0

Cloning into '/var/folders/lk/znn1qp4925j412wt4t_qkplc0000gn/T/d20190222-11171-yp7x2'...
error: RPC failed; curl 18 transfer closed with outstanding read data remaining
fatal: The remote end hung up unexpectedly
fatal: early EOF
fatal: index-pack failed

因为仓库太大了,搜索后大致有两种办法

方式一

1
2
3
4
5
6
7
## man git-config

## http.postBuffer
## Maximum size in bytes of the buffer used by smart HTTP transports when POSTing data to the remote system. For requests larger than
## this buffer size, HTTP/1.1 and Transfer-Encoding: chunked is used to avoid creating a massive pack file locally. Default is 1 MiB,
## which is sufficient for most requests.
git config --global http.postBuffer 524288000

方式二

1
2
3
git clone http://github.com/large-repository --depth 1
cd large-repository
git fetch --unshallow

使用了方式一正常解决了。因为根据错误信息说明已经是用--depth 1去下载了,但是可以去了解一下

通过[!] Error installing作为关键词去CocoaPods搜索

CocoaPods/lib/cocoapods/downloader/cache.rb

1
2
3
4
5
6
7
8
9
10
11
12
13
14
# Downloads the Pod from the given `request`
#
# @param [Request] request
# the request to be downloaded.
#
# @return [Response] the response from downloading `request`
#
def download_pod(request)
cached_pod(request) || uncached_pod(request)
rescue Informative
raise
rescue
raise
end

调用

1
2
3
4
5
6
7
8
def cached_pod(request)
cached_spec = cached_spec(request)
path = path_for_pod(request)

return unless cached_spec && path.directory?
spec = request.spec || cached_spec
Response.new(path, spec, request.params)
end

因为是用gem安装的

1
gem env

获得gem包的安装位置,定位到cache.rb,经过一些步骤之后,

cocoapods-downloader/lib/cocoapods-downloader/git.rb

1
2
3
4
5
6
7
8
9
10
11
12
13
14
15
16
17
18
19
20
21
22
23
24
25
26
27
28
29
30
# Clones the repo. If possible the repo will be shallowly cloned.
#
# @note The `:commit` option requires a specific strategy as it is not
# possible to specify the commit to the `clone` command.
#
# @note `--branch` command line option can also take tags and detaches
# the HEAD.
#
# @param [Bool] force_head
# If any specific option should be ignored and the HEAD of the
# repo should be cloned.
#
# @param [Bool] shallow_clone
# Whether a shallow clone of the repo should be attempted, if
# possible given the specified {#options}.
#
def clone(force_head = false, shallow_clone = true)
ui_sub_action('Git download') do
begin
git! clone_arguments(force_head, shallow_clone)
update_submodules
rescue DownloaderError => e
if e.message =~ /^fatal:.*does not support (--depth|shallow capabilities)$/im
clone(force_head, false)
else
raise
end
end
end
end

代码集成

创建index.js && 添加RN代码

可以参考WebStorm创建的index.jsApp.js

1
2
3
4
5
6
7
8
9
10
11
12
13
14
15
16
17
18
19
20
21
22
23
24
25
26
27
28
29
30
31
32
33
34
35
36
import React, {Component} from 'react';
import {Platform, StyleSheet, Text, View} from 'react-native';

// <1>
class RNHighScores extends React.Component {
render() {
var contents = this.props['scores'].map((score) => (
<Text key={score.name}>
{score.name}:{score.value}
{'\n'}
</Text>
));
return (
<View style={styles.container}>
<Text style={styles.highScoresTitle}>2048 High Scores!</Text>
// <2>
<Text style={styles.scores}>{contents}</Text>
</View>
);
}
}

const styles = StyleSheet.create({
container: {
flex: 1,
...
},
highScoresTitle: {
fontSize: 20,
...
},
scores: {
textAlign: 'center',
...
},
});

添加RCTRootView

XcodeViewController

1
2
3
4
5
6
7
8
9
10
11
12
13
14
15
16
17
18
19
20
21
22
23
// <3>
NSURL *jsCodeLocation = [NSURL URLWithString:@"http://192.168.31.191:8081/index.bundle?platform=ios"];
// [[RCTBundleURLProvider sharedSettings] jsBundleURLForBundleRoot:@"index" fallbackResource:nil];

RCTRootView *rootView =
[[RCTRootView alloc] initWithBundleURL: jsCodeLocation
moduleName: @"AnNativeApp" // <4>
initialProperties:
@{
@"scores" : @[
@{
@"name" : @"Alex",
@"value": @"42"
},
@{
@"name" : @"Joel",
@"value": @"10"
}
]
}
launchOptions: nil];
// <5>
[self.view addSubview:rootView];

允许网络访问

1
2
3
4
5
6
7
8
9
10
11
<key>NSAppTransportSecurity</key>
<dict>
<key>NSExceptionDomains</key>
<dict>
<key>localhost</key>
<dict>
<key>NSTemporaryExceptionAllowsInsecureHTTPLoads</key>
<true/>
</dict>
</dict>
</dict>

运行开发服务器

1
npm start

然后就可以运行Xcode项目,观察效果了

注意事项

<1> 教程中是把所有的都写在index.js中的,而目前是参考WebStorm创建的工程,除了index.js还有App.js,会报错,修改

1
export default class RNHighScores extends React.Component {

<2> 获取变量的方法可以用{}

<3>

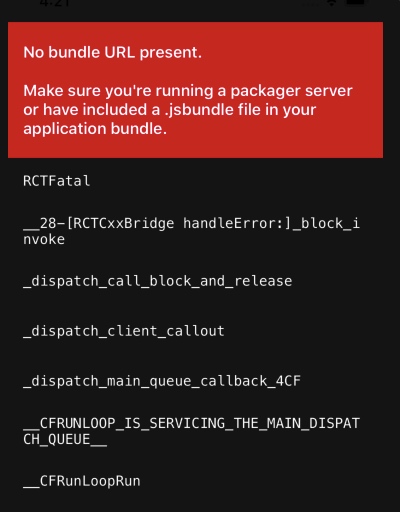
When you build a React Native application, you use the React Native packager to create an index.bundle that will be served by the React Native server. Inside index.bundle will be our RNHighScore module. So, we need to point our RCTRootView to the location of the index.bundle resource (via NSURL) and tie it to the module.

如果在真机的环境下,要替换成对应的mac(服务器)的IP

<4> 要保证

  • package.json,
  • moduleName: 后面的参数
  • AppRegistry.registerComponent(appName, () => App);
1
2
3
4
5
6
7
8
9
10
11
12
13
14
15
16
17
18
19
20
cat package.json
{
"name": "AnNativeApp",// <= 这里
"version": "0.0.1",
"private": true,
"scripts": {
"start": "node node_modules/react-native/local-cli/cli.js start"
},
"dependencies": {
"react": "^16.6.3",
"react-native": "^0.58.5"
}
}

## import {name as appName} from './app.json';
cat app.json
{
"name": "AnNativeApp", <= 这里
"displayName": "AnNativeApp"
}%

这三者是一致的

<5> RCTRootView继承自UIView,要设置frame

参考

  1. 给所有开发者的React Native详细入门指南(第一阶段)
  2. React Native 0.58 Getting-started
  3. Upgrade Node.js to the latest version on Mac OS
  4. iOS RN 0.45以上版本所需的第三方编译库(boost等)
  5. Supporting Xcode 10 and the new Xcode build system
  6. ‘glog/logging.h’ file not found
  7. [iOS] Fix pod install error in configure: C compiler cannot create executables
  8. React Native Config.h not found
  9. ReactNative iOS运行再次出错:No bundle URL present
  10. integration-with-existing-apps
  11. 搭建开发环境
iOS 颜色宏 iOS崩溃日志分析
Your browser is out-of-date!

Update your browser to view this website correctly. Update my browser now

×